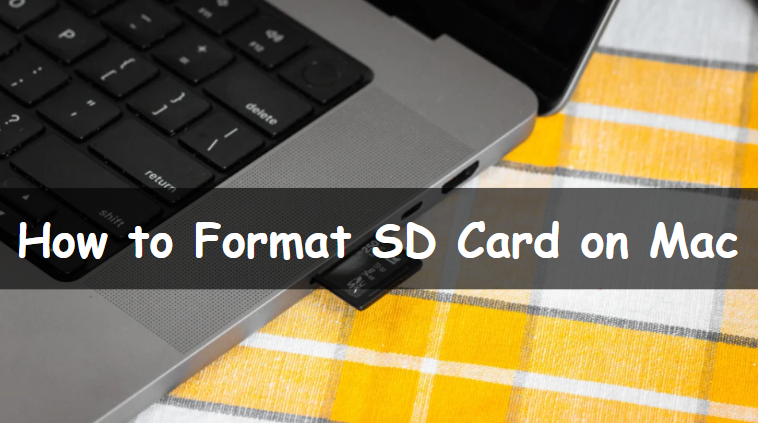
Do you require help in using your SD card on a Mac? Are you experiencing any difficulties when transferring files? No need to worry; if you format an SD card on a Mac, it can help fix many of these issues. The process is simple, quick, and straightforward and can be done using the Disk Utility application that comes with it. This article will give you an easy guide on how to format an SD card on a Mac. Following these steps will help ensure that your digital storage device is working at its best. If you are a professional photographer, someone who is skilled with technology, or just a regular user, keep reading to learn how you can quickly format your SD card on a Mac using a few simple steps.
Overview of SD Cards
SD cards, also known as Secure Digital cards, are a popular type of memory card used in various devices such as digital cameras, smartphones, and more. You will find various SD cards in the market. These cards include SD, SDHC, and SDXC. Each of them comes with different speeds and capacities. SD and SDHC cards need to be updated because they have slow transfer speeds and limited capacities. However, SDXC cards have much faster transfer speeds. They have a storage capacity of up to 2TB, which makes them a preferred option for professional photographers and videographers. It is important to remember that not all devices are compatible with every SD card. Therefore, it is crucial to check your device's specifications before buying a new SD card.
Check Out: Buy High-Quality Refurbished MacBook Air in 2023
Things You Should Do First
Formatting an SD card is an important step in managing your digital files, particularly when using it with a MacBook Pro. But before you format an SD memory card on your Mac, there are some important steps you should follow to make sure everything goes smoothly. Here are the initial tasks you should complete:
1) Check the File System Compatibility:
It is important to note that not all file systems are compatible with all operating systems. You have to check if the SD card is compatible with your Mac. For example, Mac versions older than 10.6.6 (Snow Leopard) do not support the exFAT file system. Therefore, you need to check the file system compatibility before formatting the SD card. You can check the manufacturer's instructions or website for more information if you need more clarification. Moreover, if your Mac doesn't have a built-in SDXC card reader, make sure you have a suitable SD card reader and cable to transfer files and photos at maximum speed and ensure faster formatting.
2) Remove Write Protection:
If you find that you are unable to format the SD card, it may be write-protected. Some SD cards come with a physical switch that you can slide to remove write protection. Therefore, make sure to check if your SD card has this switch.
Please choose the Correct Name: It is essential to choose the correct name of your SD card in Disk Utility or Mac Terminal. It is easy to get confused when you have multiple external devices attached to your MacBook Pro. Therefore, take your time to confirm that you are selecting the correct device name before proceeding with the formatting process.
3) Backup Your Data:
Formatting an SD card erases all data on the device. Therefore, before formatting, ensure that you have a backup of all the necessary files and documents stored on the card.
Check Out: Refurbished iPad Air Vs. iPad Pro: A Comprehensive Guide (2023)
How to Format SD Card on Mac: Step-by-Step Guide
Formatting an SD card on a Mac is a simple task that anyone can do. In this guide, we will provide an overview of the basic steps required to format an SD card on a Mac using the pre-installed application called Disk Utility.
1) Connecting the SD Card to your Mac
First, use a USB card reader to connect your SD card to your Mac. If you own a Mac that has an SD card slot, you can insert the SD card into it.

2) Opening Disk Utility
Launch the Disk Utility application on your Mac computer. To find "Disk Utility," you can either use the Spotlight finder and search for it or go to Applications > Utilities > Disk Utility.

3) Choose your SD Card
After opening Disk Utility, choose your SD card from the list of connected drives on the left side. The name should include the phrase "Secure Digital" below it.

4) Select the Erase Button
To erase, click on the Erase button located in the middle of the top section of the screen. You will see a small window that allows you to modify the name of the SD card and select the format for the file system.

5) Select a name for the SD card.
It is an optional step: Select a simple and recognizable name for your SD card that will help differentiate it from other cards or drives.

6) Select the File System Format
Select the suitable format for your SD card's file system. For SD cards that have a capacity of 64GB or more, it is advisable to choose ExFat as the file system. On the other hand, for cards that are 32GB or less, it is recommended to use MS-DOS (Fat). Please be aware that if your SD card has already been formatted, you may see a disabled option labeled MS-DOS (Fat32) in a grayed-out state. MS-DOS (Fat) and Fat32 are essentially the same. Therefore, if you require Fat32, you can utilize MS-DOS (Fat).

7) Select the Erase Option
Lastly, select the Erase button to initiate the formatting procedure. Disk Utility is a tool that can delete all the information on your SD card, change its format to the file system you chose, and make sure that the storage space is fully optimized.
Check Out: Ultimate Guide to Pick the Right Refurbished MacBook in 2023
What to Do After Formatting Your SD Card on Mac?
Once you have formatted your SD card on a Mac, it is crucial to follow some additional steps to make sure your data is secure and ready for use. Here are some suggestions to consider:
1) Verifying the Card Was Formatted Correctly:
Before using the card, make sure that the formatting process is successful. To check if the card is recognized, insert it into your camera or phone. If it is not acknowledged or functioning correctly, you might have to reformat it once more.
2) Scanning for Any Errors:
It is recommended to scan your SD card for errors after formatting, as formatting can sometimes reveal issues with the card. You can accomplish this on a Mac using the "Disk Utility" application. To start scanning, open the app and choose your SD card. Then, click on "First Aid."
3) Safely Remove the Card:
After ensuring that your card is functioning correctly, you can safely detach it from your computer. On a Mac computer, it is important to properly remove a card by either dragging it to the trash or clicking the eject icon in the Finder. That will stop any loss or damage to the data.
4) Considering a Backup Solution:
It is possible to move saved images back to your memory card, but this is usually not advised for non-professional photographers. Instead, it is recommended to store your data on multiple devices or consider using a backup solution such as an external hard drive or cloud storage.
Other Ways to Format an SD Card on Mac
In addition to the previously mentioned quick method, there are several other ways to format an SD card on a Mac. Although the built-in tools are simple to use, they may only sometimes be the most efficient. Here are two additional methods for formatting your SD card on a Mac:
Way 1: Format SD Card on Mac Via SD Card Formatter
The SD Card Formatter is a useful tool for quickly and easily formatting your SD card on a Mac. It is easy to use, saves time, and automatically chooses the right file system format, removing the need for any complex manual setup. Follow these easy steps to clear your SD card on a Mac and prepare it for your next project:
1) Download the SD Card Formatter
You can download the SD Card Formatter for free from the SD Association website. It works on both Mac and PC and can easily format different types of SD cards.
2) Connecting Your SD Card to Your Mac.
If your Mac has a built-in SD card slot, you are able to connect your SD card directly. But if your Mac doesn't have a built-in card slot, you will have to use a card reader to connect it to your computer.
3) Start the SD Card Formatter
After connecting your SD card to your Mac, launch the SD Card Formatter application. The app will detect the SD card that is connected and show its details.
4) Select Your Formatting Options
The SD Card Formatter is an easy-to-use application with a basic interface and few controls. You don't have to select a file format because the app will automatically choose the appropriate file system for formatting your SD card based on its size. Click on the 'Format' button, and the application will start formatting your SD card.
5) Waiting for Process Completion
The amount of time it takes to format your SD card will depend on its size and speed. However, formatting most SD cards typically only takes a few minutes. After the process finishes, the app will show a message to let you know that your SD card has been formatted successfully.

Check Out: Best Refurbished Samsung Phones with SD Card Slot in 2023
Way 2: Format SD Card on Mac Via Command Line
Using the command line interface to format an SD card allows the user to have more control over how the formatting is done. The user has the option to select the type of file system and make other formatting choices using straightforward commands. While using the visual interface may be simpler, this approach provides additional features for performing more advanced formatting tasks. Here is a simple way to format your SD card using the command line:
1) Connect the SD Card to the Mac and Open the Terminal.
If you cannot find the Terminal app on your Mac, you can also navigate to it using the Finder window. You can find it at Applications > Utilities > Terminal.

2) View Connected Drives on Mac with diskutil list
Enter "$ diskutil list" in the Terminal and hit Enter. That will open the list of drives connected to your Mac. Next, identify your SD card from the list displayed.
3) Using the "diskutil reformat" Command
Type in the command "$ diskutil reformat disk2," but make sure to replace "disk2" with the name of your SD card. This command will reformat your SD card without changing the current file system. Please be aware that when the formatting process is finished, all the data that was previously saved on the SD card will be completely deleted.
4) Select the New File System
Type the following command in the Terminal: "diskutil eraseDisk FAT32 MBRFormat /dev/disk2". Make sure to replace "dev" with the appropriate location of your SD card. This command will change the file system of your SD card to a different format. You can choose a different file system by replacing "FAT32" with another format like "exFAT" or "MacOS Extended."

5) Verify the Success of the Process
After finishing the formatting process, open the Terminal and type "$ diskutil list" to confirm that the SD card has been successfully formatted.
Roobotech Is the Best Place to Buy Refurbished Products in Australia.
Are you searching for a reliable and affordable place to purchase refurbished items in Australia? You don't need to search anywhere else because Roobotech is the answer! Our goal is to offer excellent consumer products while also minimizing carbon emissions and promoting the reuse of technology. We prioritize making our customers happy by providing excellent quality gadgets such as refurbished iPhones, refurbished Samsung phones, refurbished laptops, refurbished tablets, and smartwatches. Roobotech is the top choice for refurbished products in Australia because of our easy-to-use website, great weekly deals, and hassle-free return policy. We are the top choice for smart shoppers who want to save money while enjoying the latest technology, thanks to our commitment to quality and excellent customer service.
Conclusion
Formatting an SD card on a computer is a straightforward process that can be done using the built-in disk management application. We have given you detailed steps in this guide. Users can use this method to quickly and easily format an SD card on a Mac to ensure its proper functionality with digital devices. It is important to always back up any important files before formatting any storage device, such as an SD card, and ensure that you select the appropriate format type based on your requirements.
Frequently Asked Questions
How to format an SD card to FAT32 on a Mac?
On a Mac, you have the option to select the card format when deleting data from your SD card. Click Erase, then choose Format and select FAT32.
How to format an unreadable SD card on a Mac computer?
If the card is still visible in Disk Utility, start by using Disk Drill to recover data from the card. Next, attempt to fix it using Disk Utility. Select the card and click on First Aid. Or, immediately reformat it using the Erase function. If the card doesn't appear in Disk Utility, you should get professional assistance.
How to format an SD card for both Mac and PC?
Use a file system like FAT32 or exFAT to format the card, which is compatible with both macOS and Windows. However, please avoid using the NTFS format on macOS, as it can only be read.
How to delete data from an SD card on a Mac using Terminal commands?
You need to access the "Terminal" application. Please enter the command "$ diskutil list" and choose your SD card from the list. Use disk utility to reformat disk2. Replace "disk2" with the name of your SD card. To modify the SD card's file system, execute the command "diskutil eraseDisk FAT32 MBRFormat /dev/disk2." Now, substitute "dev" with the location of your SD card and then press the "Enter" key.
Why is my Mac unable to format my SD card?
There are a few reasons why you might see the Modified partition map error. It could be because the partition map on your disk is corrupted, unknown, or missing. Another possibility is that the SD card you're using has write protection enabled. It could also be due to corrupted files or errors on the drive. You can try unlocking the SD card, fixing the disk, or erasing the SD card once more.


