


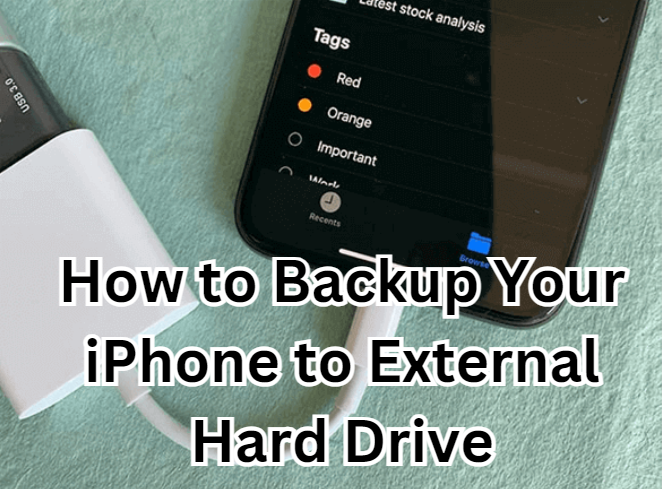
Do you also have the fear of losing your precious data saved on your iPhone? It's time to relax and take a deep breath; your problems will all be solved. You need to back up any existing data from your iPhone's fragile storage to a separate, sturdy external hard drive. Our digital age moves quickly, making accessing cherished photos and important documents easy. Ensuring their safety is now more critical than ever, but fear not!
iCloud provides convenience in storing your special memories, but other solutions exist. You can transfer iPhone data to an external hard drive, an excellent alternative to save your memories. Whether you are a technological expert or just starting, our detailed guide will remove barriers from this process and give you easy steps to perform it. Let's get started!
Backup Your iPhone to an External Hard Drive on your Mac
If you are a Mac user, you can follow the steps below and back up your iPhone to an external hard drive effortlessly. We have provided two ways: one is using Finder, and the second is using a third-party app called AnyTrans. You can also take a backup by changing the location of it. All of them work great, you can choose the one which suits you best.
Things to do Before Taking iPhone Backup on Your Mac.
Before you back up your iPhone to an external hard drive, you must verify if you already have a backup to your Mac. Avoiding duplicate backups helps to save storage space and ensures that your data is adequately backed up. By confirming the integrity of the current backup, you can prevent loss of data as well as keep specific preferences or settings. This step ensures a smooth and efficient experience and keeps your data safe as the backup process begins. Here's what you need to do:
- Open Finder from your Dock.
- Choose "your iPhone" from the Locations section.
- Click "Manage Backups."
- Press and hold the Control key and click on the backup name you want.
- Choose "Show in Finder" from the drop-down menu.

Remember, you should not copy or extract individual files from the backup folder. You could do more harm that way. Just make a complete copy of your entire backup folder. It's essential to back up your files to avoid experiencing data loss.
Way 1: Back-Up Your iPhone to an External Hard Drive on Mac Using Finder
Here's a simple guide to using Finder to backup your iPhone to an external hard drive.
- Connect the external hard drive to your Mac.
- Open Finder and click on your iOS backup folder.
- After that, you must drag this selected backup folder to the external hard drive (you will find it under Locations in the Finder sidebar).
- A pop-up may appear asking you to enter your admin password.
- Rename the backup folder on the external hard drive to "iOS_backup".
- Return to the original Finder window and rename the old backup folder to "old_backup".

That's it! With these steps, you can transfer your iPhone data to an external hard drive while keeping it safe and secure.
Way 2: Backup Your iPhone Directly to an External Drive on Mac via AnyTrans
If you do not want to use or rely on the native Finder app to back up your iPhone on the external drive, then it is not a big issue. We also have an alternative, more convenient and reliable way to back up your iOS device. You can use AnyTrans, an all-embracing file-transferring tool with multiple file manipulation options. This solution offers more flexibility and ease of use. Here are the steps to save your iPhone backup directly to an external drive:
- Connect the iOS device with your Mac and open AnyTrans.
- Click on Backup Manager and select the "Backup" option.
- Choose the specific files you want to back up.
- Select your external drive as the destination and click "Next".

Your files will be backed up and stored on your external drive, so you don't need to save them to your Mac. AnyTrans makes it super simple to back up your iPhone directly to an external hard drive, so be sure to get started today and take the headache out of backing up your iPhone.
Way 3: Change iPhone Backup Location on Mac Using a Symlink
You can use a symlink to permanently change the location of your iPhone backups on your Mac. Before you proceed, you should know about symlink and how to create one.
Creating a Symlink
So, what's a symbolic link (or symlink)? In this case, it's a file that points to your target file or backup. Creating a symlink means that no matter what, your iPhone backup will always go to an external drive. Your Mac knows to look in the symlink and to find the backup on your secondary drive. That means your backup is always stored as an independent file, not waiting for your Mac to have 400GB of free space somewhere.
Steps to backup your iPhone to an external hard drive by changing the backup location:
- Open Terminal from Utilities.
- Paste the following command in Terminal, replacing "name-of-your-external-drive" with the actual name of your external hard drive and "name-of-your-backup-folder" with the desired name for your backup folder:
ln -s /Volumes/name-of-your-external-drive/ios_backup/~/Library/Application Support/MobileSync/Backup/name-of-your-backup-folder
- Press Enter.
- Quit Terminal.

Congratulations! You have successfully created a symlink between the new and old folders containing your backup.
Check Out: Best External Hard Drive for Mac
How to Verify Successful Backing Up to an External Drive
After changing the backup location on your Mac, it's crucial to ensure that the files are correctly backed up and that your future backups will work smoothly. Follow these steps to check if backing up your iPhone to an external hard drive is functioning correctly:
- Connect your iPhone to your Mac.
- Open Finder and select your iPhone.
- Click on "Back Up Now."
- Wait for the backup, then navigate to your external hard drive's new "iOS_backup" folder.
- Verify the Date Modified information, which should align with your recent activity.

Backup an iPhone to an External Hard Drive on Windows/PC
As we have mentioned, there are some ways to backup your iPhone to an external hard drive using MAC; similarly, there are also ways for people using Windows or PCs to back up their data to an external drive. Below, we have mentioned all those ways to help people who don't have a Mac and choose Windows/PC to perform this task.
Way 1: Backup an iPhone to an External Hard Drive on Windows Using iTunes
First, to back up your iPhone to an external hard drive on Windows, ensure you have iTunes installed. Let's go ahead:
- Connect your iPhone to your PC and open iTunes.
- Unlock your iPhone, and tap "trust" as soon as it's connected.

- Press the iPhone icon located in the top left corner of iTunes.
- Now scroll down to "manually backup and restore". Click "back up now".

- Wait for the backup to finish.
- Find the backup files on your PC at C:\ Users \Raing\ AppData \Roaming \Apple Computer\MobileSync\ Backup (please replace "Rain" with your Windows user name).
- Copy the newest backup folder by right-clicking on it.
- Connect your external hard drive and open it in File Explorer.
- Right-click inside the external hard drive and select "paste" to transfer the backup folder.
- Repeat these steps when you manually back up your iPhone to your PC.
With these instructions, backing up your iPhone is no longer a problem. It will also help keep data safe!
Way 2: Backup iPhone to External Hard Drive on PC Using FoneTool
If you want to back up your iPhone to an external hard drive without using iTunes, FoneTool may provide the required functionality. FoneTool is especially suited for people new to backing up files, with a user interface showing how you're doing things clearly in plaintext.
Benefits of Using FoneTool:
- Complete and Selective Backup: Choose to back up all your iPhone data or select specific file types and individual files.
- High-Quality Print: FoneTool ensures a rapid backup process, sparing your time wasted with methods like iTunes or iCloud.
- Widely Compatible: Works with many iOS and storage devices, including brands like Seagate, WD and Samsung.
- Easy Management: FoneTool includes logical data management options. You can easily find your backups and erase or restore them.
Steps for Full Backup
- First, turn on the computer's monitor and open the software.
- Go into his "Phone Backup" section to set everything via this system.
- Select the "Full Backup" option from the main interface and click "Get Started".

- If you have an external hard disk as a backup device, choose this for where your data is to be stored. Remember that backups may also be encrypted to protect everything from needing authorization.
- Click "Start Backup" to generate a copy of your hard drive.

Steps for Selective Backup
- Head into "Selective Backup" in the "Phone Backup" section. Click on "Get Started."

- You can check out all the available data categories and select the ones you wish to back up.

- Select your external hard drive as the backup location.
- Lastly, like "Start Backup", copy your chosen data to the external drive.

Tips for Restoration
- Access Backup Files: Go to the "Backup Files" facility to restore an already made backup.
- Initiate Restoration: Click the backup you want and select "Restore" to shift the backup content to your iPhone or another iOS gadget.

Following this simple method, you can make sure that all your iPhone memory is secure and, at the same time, efficiently transferred to an external hard drive through FoneTool; in that case, it will be 100% safe for future use.
Check Out: Best 1 Terabyte Hard Drive for a Laptop
Way 3: Changing Your Backup Location on a PC
- When connecting your external hard drive to your computer, please click the hard drive to a free USB port on your computer using a USB cable.
- Press ⊞ Win+E from the keyboard or click the File Explorer icon (a blue folder with a clip) on the taskbar or the Windows Start menu.
- Use File Explorer to decide on a suitable place on your hard drive where you would like to store your iPhone backups.
- Click on the address bar at the top of File Explorer to highlight the backup location - Right-click on the highlighted address and choose Copy.
- Press the Windows key, type "cmd", and click on Command Prompt in the search results.
- Use the appropriate command below depending on whether you downloaded iTunes from the web or the Microsoft Store. Replace '[new backup location]' with the location you copied in Step 4.
- If you downloaded iTunes from the web: mklink /J ""%APPDATA%\Apple Computer\MobileSync\Backup ""[new backup location]."
- If you downloaded iTunes from the Microsoft Store: mklink /J ""%USERPROFILE%\Apple\MobileSync\Backup ""[new backup location]."
Directly Connect an External Hard Drive to Your iPhone:
You can use the simple steps to connect your external hard drive to your iPhone directly.
- You need a lightning-to-USB-C adaptor or an Apple Lighting to USB 3 Camera Adapter to connect an external hard drive to an iPhone.
- Now, insert the lightning cable into the charging port of any model of iPhone.
- Attach its USB cable to an external hard drive through one of its ports once connected to your iPhone.
- Look for the icon that appears to be shaped like a blue folder, and click it. Your device will then offer the option to launch the Files App.
- Select the files you want to back up, including photos, videos, or documents.
- Tap the share icon in the screen's upper-right corner.
- Look below the thumbnail picture of the file selected and find your external hard drive.
- Now save all those files you have selected to the external hard drive.
Benefit of Using External Storage for Backups
Backing up your essential files ensures their safety; you'll never lose them in an accident. While there are other ways to backup your files, your best bet is creating a copy on an external storage device. This method of file storage not only frees up storage space on your Mac's internal hard drive and protects your files if your Mac's HDD fails.
Embrace Sustainability with Roobotech's Quality Refurbished Products
Roobotech has now become the go-to place for tech lovers in Australia. We offer various devices, including smartphones, smartwatches, tablets, laptops, and other tech products. All the famous brands like Apple, Samsung, Oppo, and Google are available on our website.
At Roobotech, we value the importance of sustainable and responsible technology consumption. Each of our carefully refurbished products embraces a green recycling initiative. That makes it simple and safe for you to stop the explosion of e-waste and other pitfalls of online scams.
This philosophy has accompanied our journey to ensure we offer only the best in high-quality standards and customer service beyond comparison. Thanks to our professional technicians, who perform comprehensive quality checks on all devices, the refurbishing process replaces every product to as-good-as-new function, thoroughly sanitized. Our website is SSL-encrypted to make your shopping experience secure and seamless.
We have the most competitive pricing you won't get from competitors such as Reeblo and Kogan. We stock all the major brands and an incredible array of devices, ready for delivery to your door. We also provide excellent other facilities like warranty, returns, and most helpful and satisfying customer service. Explore our products today and buy your favourite ones.
Conclusion
Backing up your iPhone with an external hard drive is a cutting-edge, safe, and effective method of safeguarding your all-important data. Whether changing the backup location on a PC, connecting an external hard drive straight into your iPhone, or using a third-party tool such as FoneTool for a more user-friendly endeavour, you can easily protect your digital life from unexpected loss. With the tools and methods we've provided, your data, including photos, files, music, and memories, will be securely stored for decades.
Frequently Asked Questions
How can I save an iPhone backup on an external drive?
You have to connect your external drive and iPhone to your Mac. You can run Finder, select your iPhone in the list of "Locations", and then activate "Automatically sync whenever this iPhone is connected". That will automatically create a backup of your iPhone photos to an external hard disk or SSD.
How can I connect an external hard drive to my iPad or iPhone?
You can use a cable adapter to add external storage capacity to an iPhone or iPad. In addition, sometimes (depending on what type of cable you use), your iOS device may request permission to connect by asking if it should 'Trust This Computer'.
Can I backup only my photo library to an external hard drive?
Yes, you can! With FoneTool's Selective Backup feature, you can transfer your required photos without transferring anything extra. Pick up the pictures you want to back up in the display, select an external hard drive as the backup location, and click "Start Backup".
Can I back an iPhone to an external hard drive without a computer?
If you don't have your computer, you can back up the iPhone to optimize space on an external hard drive. Here's how:
- Connect a USB-C connector or Apple's Lightning to USB 3 Camera Adapter to your iPhone.
- With the adapter, attach your external hard drive.
- On your iPhone, you can select the photos, videos or more you want to move to an external hard drive.
- Press the Share icon and choose the external hard drive as the destination.
- Press Save, and your files will begin copying to the external hard drive.
Can we directly transfer files from an iPhone to an external hard drive?
Yes, you can. Many external hard drives now have a USB-C cable to connect them directly to your iPhone or iPad. That means that you can exchange data without needing a computer any more.
How can I transfer photos from iCloud to an external hard drive?
To download your photos and videos from your device, follow these steps:
- On your iPhone, iPad, or iPod touch, go to Settings > [your name] > iCloud > Photos.
- Enable the "Download and Keep Originals" option.
- Connect your device to your computer and import the photos.
- Open the Photos App on your Mac and select the images and videos you want to copy.
- Transfer them to your external hard drive.
Remember to ensure the photos are successfully transferred before deleting them from iCloud.
Can I back my iPhone up to one drive?
No, you cannot back up your iPhone to OneDrive. Instead, you can back up to a computer or iCloud. However, you can copy files to OneDrive by installing the Microsoft OneDrive app from the App Store.